
Quick answer
To move a website to a new host with less downtime and protected email, inventory everything on the old host, stage and test the copy before changing DNS, plan DNS and email together, switch and verify, and keep the old host active as a rollback until everything is confirmed. Zero downtime cannot be promised.
- Check whether email lives on the same host, because many businesses forget to move it.
- Lower the DNS time-to-live some time before the change so updates spread faster.
- Verify certificate, forms, email sending and receiving, scheduled jobs and analytics, including from a phone on mobile data.
Changing hosts is usually routine, but the risks are real: a broken site, missed email and a surprise bill from the old host. This guide gives a plan to reduce downtime and protect email. It does not promise zero downtime, which depends on your setup.
It differs from a redesign or URL migration, which is about search visibility. For that, see redesigning without losing Google rankings. The checklist is generic. Check your providers’ instructions.
Step 1: inventory everything
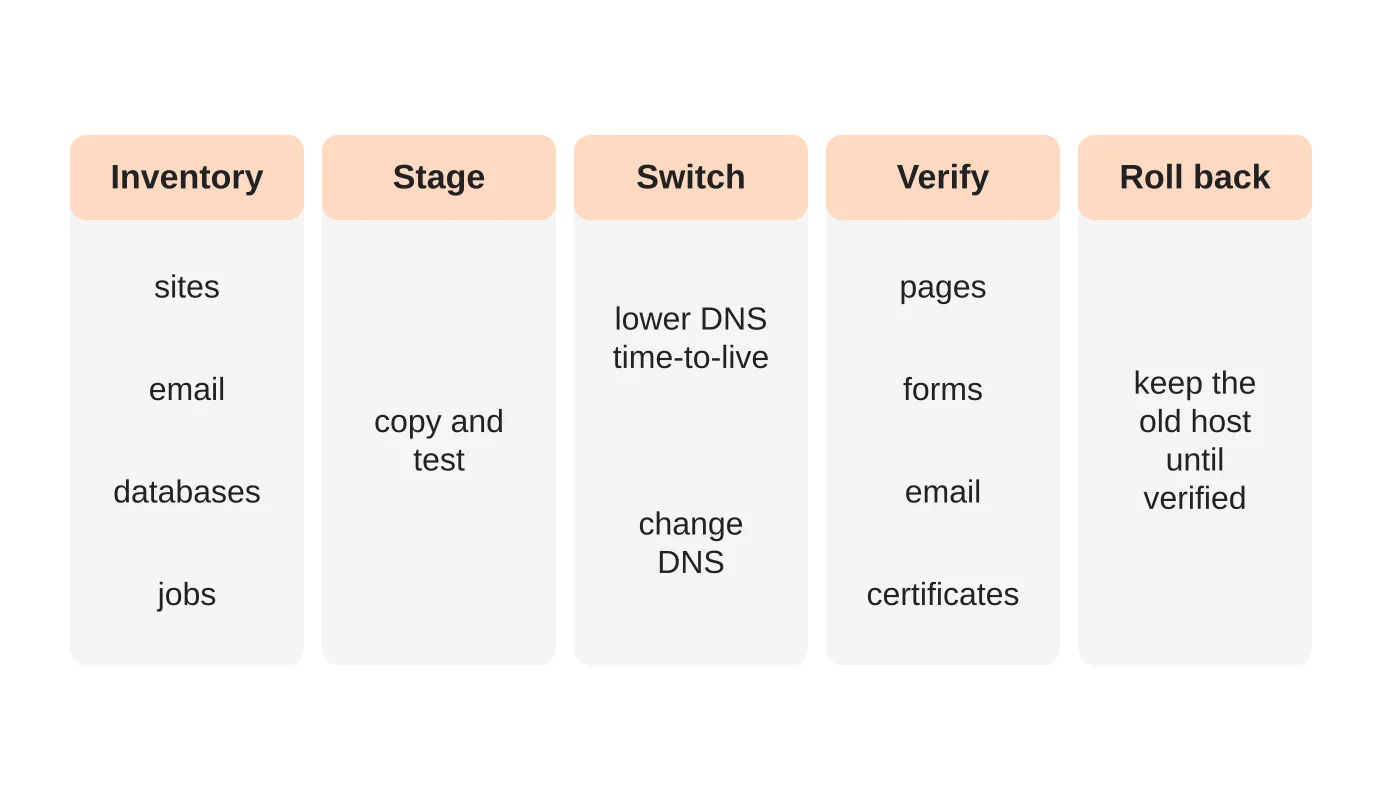
List what lives on the old host: the website and database, other sites or subdomains, email accounts, scheduled jobs, SSL certificates, redirects, forms and third-party connections. Many businesses find email is on the same host and forget to move it. Know who controls the domain. See domain, hosting and email responsibilities.
Step 2: stage and test the copy
Copy the site to the new host and test it before changing DNS. Check pages, forms, search, checkout and logins. Test using a temporary address or a local hosts-file entry so the live site stays unchanged. Compare the staged site with the live one. Have a person who knows the business click through the key journeys.
Step 3: plan DNS and email
DNS tells the internet where your site and email live. Decide the order:
- Lower the DNS time-to-live (TTL) some time before the change, so changes spread faster.
- Email: keep email running throughout. If email moves too, create the mailboxes first, copy existing mail and update MX and authentication records together. See SPF, DKIM and DMARC for small business email.
- Choose a quiet time and tell staff.
Step 4: switch and verify
Change DNS records as planned. Then check: the site loads from the new host, the certificate is valid, forms deliver, email sends and receives, scheduled jobs run and analytics fires. Test from a phone on mobile data too, since DNS spreads at different times in different places.
Step 5: keep a rollback
Keep the old host active until everything is verified and DNS has settled. If something fails, you can point DNS back. Do not cancel until backups are stored and the owner signs off.
A responsibility map
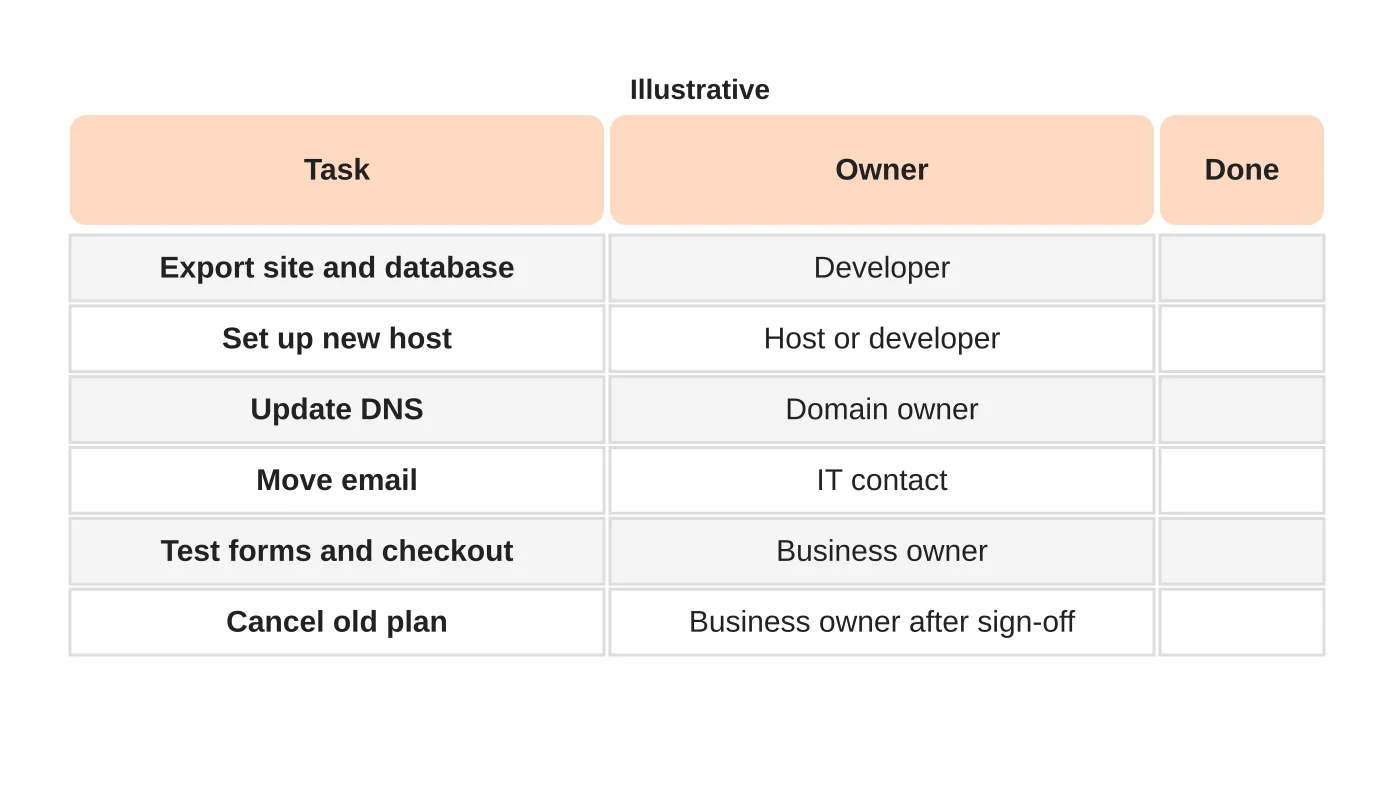
Agree who does what, including who tells staff and who tests. Put the map in writing. See before you renew hosting for export and exit terms to check.
After the move
Watch for errors and email bounces for a few days. Update your records, passwords and monitoring. Remove access from the old host. Review speed and backups on the new host.
Frequently asked questions
Will there be downtime?
Often little, but I cannot promise none. Plan for a short window and a rollback.
Can my host move it for me?
Many offer migration help. Ask what they test and what they do not cover.
What about my email?
Treat it as its own project inside the move. Test it carefully.
Do I need to tell Google?
For a host move with the same addresses, usually no special step. Monitor Search Console for errors.
Sources
Plan your move
Web Design Davao’s hosting team can discuss a host move for your site and email. Get in touch.