

Quick answer
Give a virtual assistant the least access their role needs, in individual accounts the business can control and remove. Inventory the tools they touch, choose the lowest role that works, keep billing and ownership with the business, turn on two-step verification, test permissions, and review them on a fixed schedule. Never store passwords in your records.
- Prefer editor over administrator, and view-only where editing is not needed; add access later if evidence shows a need.
- Give the assistant their own login so actions are traceable, and use a password manager for any unavoidable shared account.
- Review access on a schedule such as quarterly, remove unused access and keep a log of who has what.
Giving a new virtual assistant “access to everything” saves a day and creates risk for years. Giving too little stalls the work. The middle path is least privilege: the access each role needs, in accounts you can control and remove.
This guide gives a checklist and a fictional matrix. It never includes passwords or credentials, and neither should your records. Check each tool’s own roles and security options. For ending access, see offboarding a freelancer or virtual assistant, and for rules on AI tools see an AI use policy for staff and virtual assistants.
Step 1: inventory tools
List every system the role touches: email, calendar, shared drives, CRM, website, social accounts, accounting, project tools and messaging. For each, note what the person must do there. Include tools you may forget, such as the domain registrar or ad accounts, and record who owns each.
Step 2: grant least required access
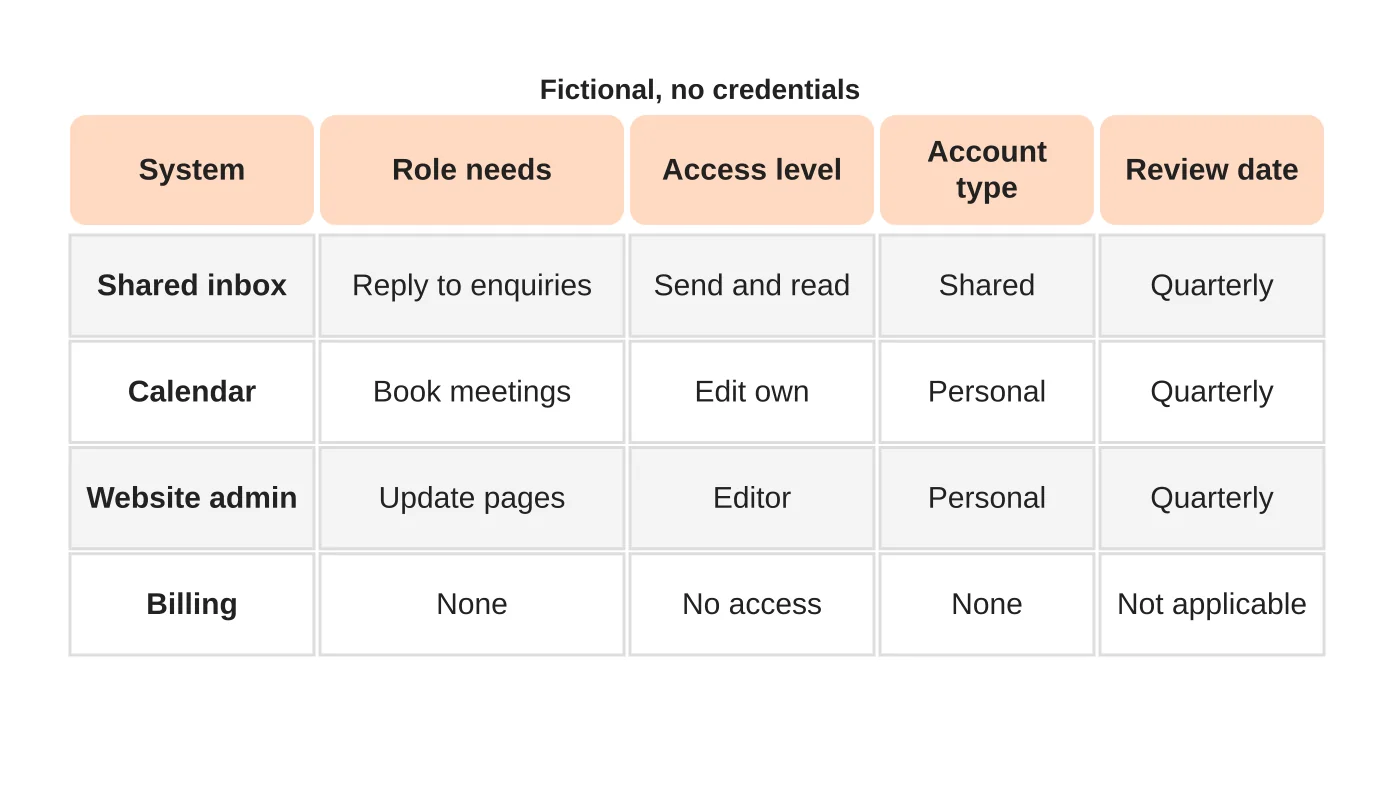
Choose the lowest role that allows the work. Prefer “editor” over “administrator”, and view-only where editing is not needed. Keep billing, banking and ownership with the business. Restrict access to folders and records the role requires. Add access later when evidence shows it is needed. See a 30-day onboarding plan for staged access.
Step 3: separate shared and personal accounts
Give the assistant their own login wherever the tool allows it, so actions are traceable and can be removed without disrupting others. Use shared accounts only where a tool forces it, and control them through a password manager. Turn on two-step verification, with recovery routes owned by the business. Do not share passwords by chat or email.
Step 4: test and review permissions
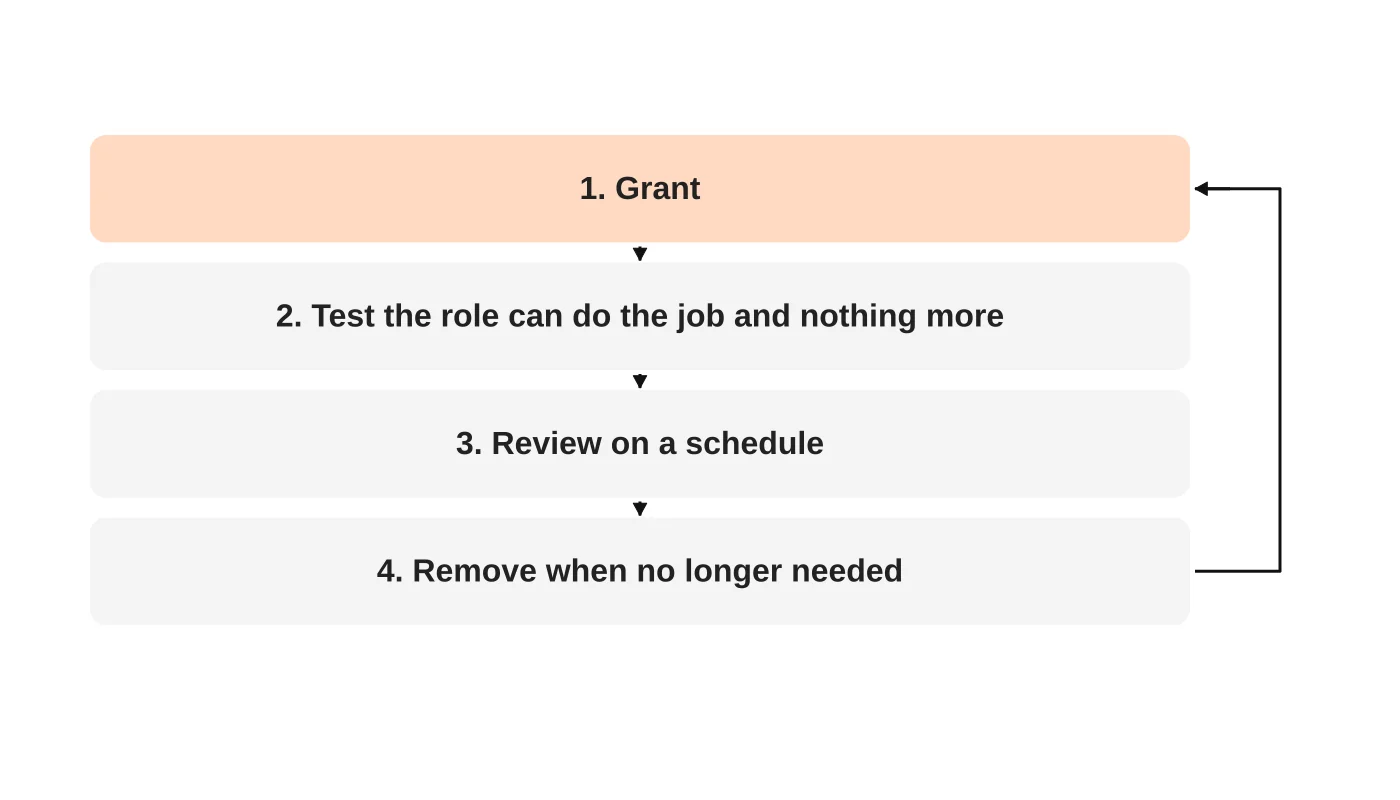
After granting access, test that the person can do their tasks and cannot do what they should not, using a test item if possible. Review access on a fixed schedule, such as quarterly, and whenever the role changes. Remove access that is unused. Keep a simple log of who has what and when it was last checked.
Step 5: plan for the end
Know how to remove each account quickly: whom to ask, what to transfer and what to recover. Put it in the same register. See social account access and handover.
Frequently asked questions
Can I give admin access to save time?
It is rarely needed. Use the lowest role that works.
Should the VA use their own device?
Agree security expectations for any device used.
What about client data?
Limit access to what is needed and follow your privacy obligations.
How do I track who did what?
Use individual accounts and activity logs where available.
Sources
Set access up safely
Web Design Davao’s outsourced staffing team can discuss access arrangements for your remote support. Get in touch.